Create a Custom NPC
Goal
Create a Slime — a hostile NPC that chases and attacks players on sight. You will set up a 3D model with animations, define its AI behavior through template inheritance, configure a weighted drop table, and add multilingual translations. By the end, you will have a fully working NPC mod you can spawn in Creative Mode.
What You’ll Learn
- How NPCs are structured across three JSON layers (Server Model, NPC Role, Drop Table)
- How to set up a model with 9 animation sets
- How template inheritance (
Template_Predator) provides AI behavior - How weighted drop tables control loot
- How to add translations for EN, ES, and PT-BR
Prerequisites
- A mod folder with a valid
manifest.json(see Setup Your Dev Environment) - Blockbench with the Hytale plugin installed
- Familiarity with JSON template inheritance (see Inheritance and Templates)
Companion mod repository: hytale-mods-custom-npc
NPC Architecture Overview
Unlike blocks and items which each use a single JSON file, NPCs require three separate definitions that work together:
flowchart TD;    A[Server Model<br>Model + Animations + HitBox] --> D[NPC in Game];    B[NPC Role<br>AI Behavior + Stats] --> D;    C[Drop Table<br>Loot on Death] --> D;
style A fill:#2d6a8f,color:#fff; style B fill:#2d5a27,color:#fff; style C fill:#8f6a2d,color:#fff; style D fill:#5a2d8f,color:#fff;| Layer | File Location | Purpose |
|---|---|---|
| Server Model | Server/Models/ | Links the .blockymodel file, texture, animations, hitbox, and camera settings |
| NPC Role | Server/NPC/Roles/ | Defines AI behavior via template inheritance, health, knockback, and translation keys |
| Drop Table | Server/Drops/ | Controls what loot drops when the NPC dies, using weighted random selection |
The Server Model Appearance name connects all three — the NPC Role references it, and the engine uses it to find the correct model, texture, and animations.
Step 1: Create the Model and Texture in Blockbench
Open Blockbench and create a new Hytale Character project:
- Block Size: 64
- Pixel Density: 64
- UV Size: 128×128 (texture must match: 128×128 pixels)
Build the slime body using cubes organized in groups. For the Slime, the structure is:
| Group | Purpose |
|---|---|
Body | Main slime body (large cube) |
Head | Top portion (used by camera tracking) |
Eyes | Face details |
Arm_Left / Arm_Right | Small appendages for attack animations |
Leg_Left / Leg_Right | Base stubs for walk animations |
Paint the texture in the Paint tab — green tones with darker spots work well for a slime creature.

Export the Model
- File > Export > Export Hytale Blocky Model → save as
Model_Slime.blockymodel - Save the texture separately as
Texture.png(128×128)
Create Animations
NPCs need animation files for each movement state. Create these 9 animations in Blockbench’s Animate tab:
| Animation | File | Loop | Purpose |
|---|---|---|---|
| Idle | Idle.blockyanim | Yes | Standing still — subtle bounce |
| Walk | Walk.blockyanim | Yes | Moving forward |
| Walk_Backward | Walk_Backward.blockyanim | Yes | Moving backward |
| Run | Run.blockyanim | Yes | Chasing the player |
| Attack | Attack.blockyanim | Yes | Melee strike |
| Death | Death.blockyanim | No | Plays once on death |
| Crouch | Crouch.blockyanim | Yes | Crouching idle |
| Crouch_Walk | Crouch_Walk.blockyanim | Yes | Crouching forward |
| Crouch_Walk_Backward | Crouch_Walk_Backward.blockyanim | Yes | Crouching backward |
Export each animation with File > Export > Export Hytale Block Animation.
Step 2: Set Up the Mod File Structure
Place your files in the mod folder following this exact structure:
CreateACustomNPC/├── manifest.json├── Common/│ ├── Icons/│ │ └── ModelsGenerated/│ │ └── Slime.png│ └── NPC/│ └── Beast/│ └── Slime/│ ├── Model/│ │ ├── Model_Slime.blockymodel│ │ └── Texture.png│ └── Animations/│ └── Default/│ ├── Idle.blockyanim│ ├── Walk.blockyanim│ ├── Walk_Backward.blockyanim│ ├── Run.blockyanim│ ├── Attack.blockyanim│ ├── Death.blockyanim│ ├── Crouch.blockyanim│ ├── Crouch_Walk.blockyanim│ └── Crouch_Walk_Backward.blockyanim├── Server/│ ├── Models/│ │ └── Beast/│ │ └── Slime.json│ ├── NPC/│ │ └── Roles/│ │ └── Slime.json│ ├── Drops/│ │ └── Drop_Slime.json│ └── Languages/│ ├── en-US/│ │ └── server.lang│ ├── es/│ │ └── server.lang│ └── pt-BR/│ └── server.langAll paths in Common/ must start with an allowed root: NPC/, Icons/, Items/, Blocks/, etc. The model and animations go under NPC/, and the spawn icon goes under Icons/.
Step 3: Create the manifest.json
{ "Group": "HytaleModdingManual", "Name": "CreateACustomNPC", "Version": "1.0.0", "Description": "Implements the Create A NPC tutorial with a custom slime", "Authors": [ { "Name": "HytaleModdingManual" } ], "Dependencies": {}, "OptionalDependencies": {}, "IncludesAssetPack": true, "TargetServerVersion": "2026.02.19-1a311a592"}Step 4: Define the Server Model
The Server Model is the bridge between the 3D assets in Common/ and the game engine. It tells Hytale where to find the model, texture, and every animation.
Create Server/Models/Beast/Slime.json:
{ "Model": "NPC/Beast/Slime/Model/Model_Slime.blockymodel", "Texture": "NPC/Beast/Slime/Model/Texture.png", "EyeHeight": 1.5, "CrouchOffset": -0.15, "HitBox": { "Max": { "X": 0.8, "Y": 2.0, "Z": 0.8 }, "Min": { "X": -0.8, "Y": 0, "Z": -0.8 } }, "Camera": { "Pitch": { "AngleRange": { "Max": 15, "Min": -15 }, "TargetNodes": ["Head"] }, "Yaw": { "AngleRange": { "Max": 15, "Min": -15 }, "TargetNodes": ["Head"] } }, "AnimationSets": { "Walk": { "Animations": [ { "Animation": "NPC/Beast/Slime/Animations/Default/Walk.blockyanim" } ] }, "Attack": { "Animations": [ { "Animation": "NPC/Beast/Slime/Animations/Default/Attack.blockyanim" } ] }, "Idle": { "Animations": [ { "Animation": "NPC/Beast/Slime/Animations/Default/Idle.blockyanim" } ] }, "Death": { "Animations": [ { "Animation": "NPC/Beast/Slime/Animations/Default/Death.blockyanim", "Loop": false } ] }, "Walk_Backward": { "Animations": [ { "Animation": "NPC/Beast/Slime/Animations/Default/Walk_Backward.blockyanim" } ] }, "Run": { "Animations": [ { "Animation": "NPC/Beast/Slime/Animations/Default/Run.blockyanim" } ] }, "Crouch": { "Animations": [ { "Animation": "NPC/Beast/Slime/Animations/Default/Crouch.blockyanim" } ] }, "Crouch_Walk": { "Animations": [ { "Animation": "NPC/Beast/Slime/Animations/Default/Crouch_Walk.blockyanim" } ] }, "Crouch_Walk_Backward": { "Animations": [ { "Animation": "NPC/Beast/Slime/Animations/Default/Crouch_Walk_Backward.blockyanim" } ] } }, "Icon": "Icons/ModelsGenerated/Slime.png", "IconProperties": { "Scale": 0.25, "Rotation": [0, -45, 0], "Translation": [0, -61] }}Server Model Fields
| Field | Type | Purpose |
|---|---|---|
Model | String | Path to .blockymodel file (relative to Common/) |
Texture | String | Path to texture .png (relative to Common/) |
EyeHeight | Number | Vertical position of the NPC’s eyes in blocks — affects camera and line of sight |
CrouchOffset | Number | How far the model drops when crouching |
HitBox | Object | Bounding box for damage detection. Min/Max define the corners in blocks |
Camera | Object | How the NPC’s head tracks targets. TargetNodes must match group names in the model |
AnimationSets | Object | Maps game states to animation files. Each set can have multiple weighted animations |
Icon | String | Spawn menu icon path (relative to Common/) |
IconProperties | Object | Scale, rotation, and translation for the icon render |
Step 5: Define the NPC Role
The NPC Role defines behavior and stats. Instead of writing AI from scratch, Hytale uses template inheritance — you pick a behavior template and override only what differs.
Create Server/NPC/Roles/Slime.json:
{ "Type": "Variant", "Reference": "Template_Predator", "Modify": { "Appearance": "Slime", "MaxHealth": 75, "KnockbackScale": 0.5, "IsMemory": true, "MemoriesCategory": "Beast", "NameTranslationKey": { "Compute": "NameTranslationKey" } }, "Parameters": { "NameTranslationKey": { "Value": "server.npcRoles.Slime.name", "Description": "Translation key for NPC name display" } }}How Template Inheritance Works
The "Type": "Variant" + "Reference": "Template_Predator" pattern means:
- Start with all fields from
Template_Predator(hostile AI, chase logic, attack patterns, view range) - Override only the fields listed in
"Modify"(appearance, health, knockback, etc.) - Everything else (decision making, combat logic, movement speeds) comes from the template
Available NPC Templates
| Template | Behavior | Use For |
|---|---|---|
Template_Predator | Hostile — chases and attacks players on sight | Enemies, hostile creatures |
Template_Prey | Passive — flees when threatened | Rabbits, deer, small animals |
Template_Neutral | Neutral — attacks only when provoked | Bears, wolves |
Template_Domestic | Tame — follows owner, can be penned | Farm animals, pets |
Template_Beasts_Passive_Critter | Passive critter — wanders, flees | Squirrels, frogs, bugs |
NPC Role Fields
| Field | Type | Purpose |
|---|---|---|
Appearance | String | Must match the Server Model filename (without .json). This is how the engine links the Role to the Model |
MaxHealth | Number | Hit points. Vanilla enemies range from 30 (Skeleton) to 500+ (bosses) |
KnockbackScale | Number | Resistance to knockback. 1.0 = normal, 0.5 = half knockback, 0 = immovable |
IsMemory | Boolean | Whether the NPC appears in the player’s Memories bestiary |
MemoriesCategory | String | Bestiary tab: Critter, Beast, Boss, Other |
NameTranslationKey | Compute | Translation key for the name shown above the NPC’s head |
The Compute Pattern
"NameTranslationKey": { "Compute": "NameTranslationKey"}This tells the engine: “get the value of NameTranslationKey from the Parameters block.” The Parameters section then provides the actual value:
"Parameters": { "NameTranslationKey": { "Value": "server.npcRoles.Slime.name", "Description": "Translation key for NPC name display" }}This indirection exists because templates use Compute to read values that each variant defines differently. Every variant provides its own NameTranslationKey value, but the template’s logic for using it stays the same.
Step 6: Create the Drop Table
The drop table controls what loot falls when the NPC dies. For now, create an empty drop table so the Slime drops nothing:
Create Server/Drops/Drop_Slime.json:
{}Then connect it to the Slime by adding DropList to the NPC Role. Open Server/NPC/Roles/Slime.json and add the highlighted line:
{ "Type": "Variant", "Reference": "Template_Predator", "Modify": { "Appearance": "Slime", "MaxHealth": 75, "DropList": "Drop_Slime", "KnockbackScale": 0.5, "IsMemory": true, "MemoriesCategory": "Beast", "NameTranslationKey": { "Compute": "NameTranslationKey" } }, "Parameters": { "NameTranslationKey": { "Value": "server.npcRoles.Slime.name", "Description": "Translation key for NPC name display" } }}The "DropList": "Drop_Slime" tells the engine to look for Server/Drops/Drop_Slime.json when the NPC dies.
Step 7: Add Translations
Create a server.lang file for each language under Server/Languages/:
Server/Languages/en-US/server.lang
npcRoles.Slime.name = SlimeServer/Languages/es/server.lang
npcRoles.Slime.name = SlimeServer/Languages/pt-BR/server.lang
npcRoles.Slime.name = SlimeThe translation key in the .lang file must match the Parameters.NameTranslationKey.Value in the NPC Role — but without the server. prefix. The engine adds the prefix automatically when resolving server-side language files.
Step 8: Package and Test
-
Copy the
CreateACustomNPC/folder to%APPDATA%/Hytale/UserData/Mods/ -
Launch Hytale and enter Creative Mode
-
Check the log at
%APPDATA%/Hytale/UserData/Logs/for your mod loading:[Hytale] Loading assets from: ...\Mods\CreateACustomNPC\Server[AssetRegistryLoader] Loading assets from ...\Mods\CreateACustomNPC\Server -
Grant yourself operator permissions and spawn the Slime using chat commands:
/op self/npc spawn Slime -
Verify:
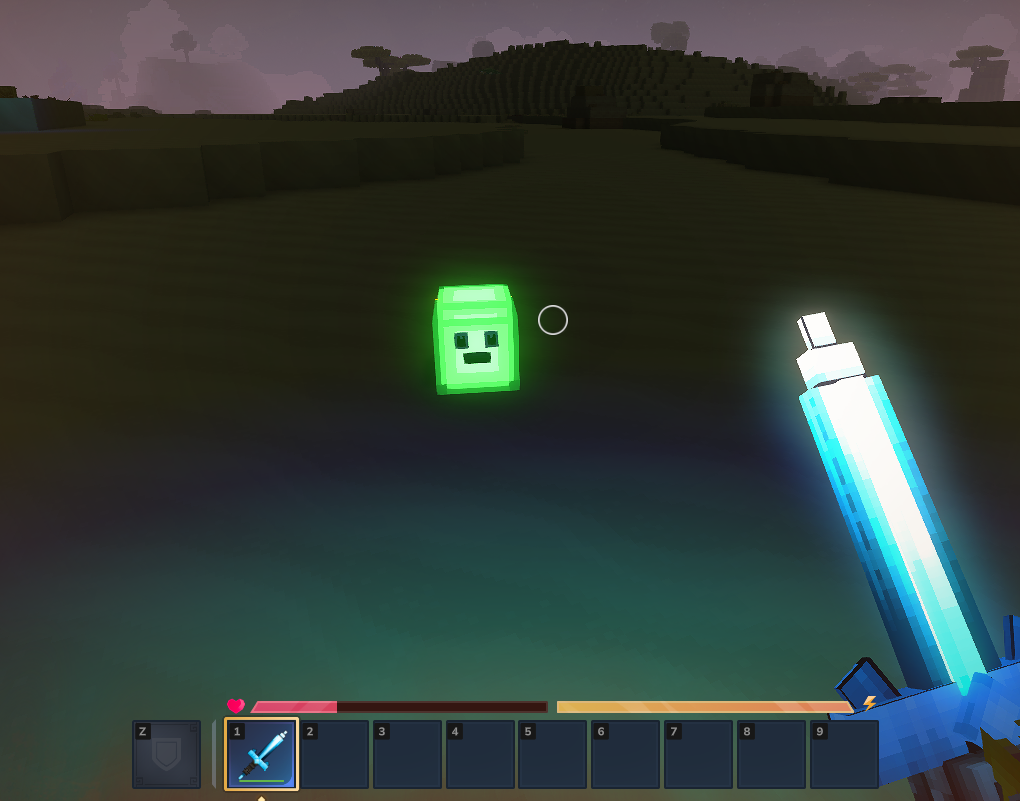
- The model renders correctly with the slime texture
- The NPC is hostile and chases you on sight
- Attack, walk, run, and death animations play correctly
- The name “Slime” appears above its head
- Killing it drops one of: Crystal Slime Ore (50%), Health Potion (30%), or nothing (20%)
Common Pitfalls
| Problem | Cause | Fix |
|---|---|---|
Common Asset 'path' must be within the root | Model/texture path doesn’t start with NPC/, Icons/, etc. | Move files under an allowed root directory in Common/ |
Common Asset 'path' doesn't exist | Path in JSON doesn’t match the actual file location | Double-check every path in the Server Model — they’re relative to Common/ |
| NPC spawns but is invisible | Server Model Model path is wrong or .blockymodel is corrupted | Re-export from Blockbench, verify the path |
| NPC stands still, won’t attack | Wrong template or missing animations | Verify Reference is Template_Predator and all 9 animation sets exist |
| NPC slides without animation | Animation set name doesn’t match expected name | Use exact names: Walk, Run, Idle, Attack, Death, etc. |
| Name doesn’t show above NPC | Translation key mismatch | Ensure .lang key matches Parameters.NameTranslationKey.Value minus the server. prefix |
| Death animation loops | Missing "Loop": false on Death animation | Add "Loop": false to the Death entry in AnimationSets |
| Drop table not working | DropList field missing from NPC Role | Add "DropList": "Drop_Slime" to the Modify block (omitted here since Template_Predator handles it) |
Next Steps
- Create a Custom Block — Build a glowing crystal block to use as an NPC drop
- Create a Custom Weapon — Create a sword to fight your new NPC
- NPC Roles Reference — Complete schema reference for NPC role definitions
- Custom Loot Tables — Add guaranteed and rare drops to your Slime NPC
- Drop Tables Reference — Advanced drop table patterns with nested containers